Reasons:
- The domain is expired.
- DNS server issue.
- DNS cache issue.
- Website’s nameserver issue.
- Antivirus issue.
The domain is expired
When a domain is expired, or deleted, it doesn’t have any DNS settings. So, there is no IP address involved with the domain name. That’s why when you try to visit the expired domain, your browser sends a DNS query but can’t get any IP address in return.

You can check the status of a domain name whether it’s active or expired/deleted. Go to Whois Domain Lookup Tool and type the domain name. Click Search and solve the captcha to prove that you are not a robot.
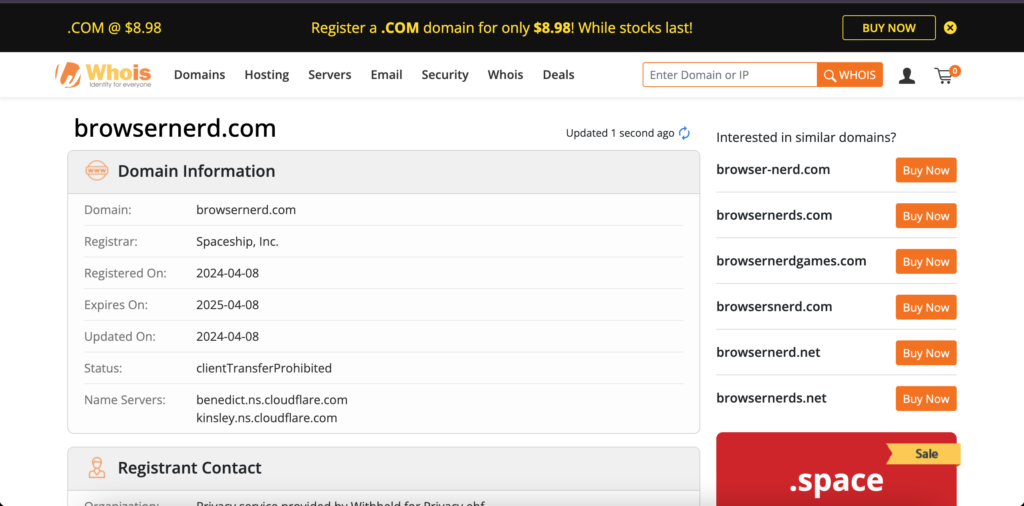
If the domain is deleted, you will see that the domain is not registered. Otherwise, if it’s in the grace period or pending deletion, you can see the status.
Update DNS Server
The Internet won’t function without a DNS server. Imagine remembering 31.13.66.35 instead of facebook.com. Every ISP and mobile operator uses a DNS server so users can visit facebook.com instead of 31.13.66.35.
A DNS server helps you find and connect to the IP address of a website. Sometimes your ISP’s DNS server may stop working and your browser won’t find the IP address of the website you are visiting.
That’s why you should always use public DNS servers if you aren’t already. Public DNS servers are free, safe, and reliable.
Change DNS on Chrome
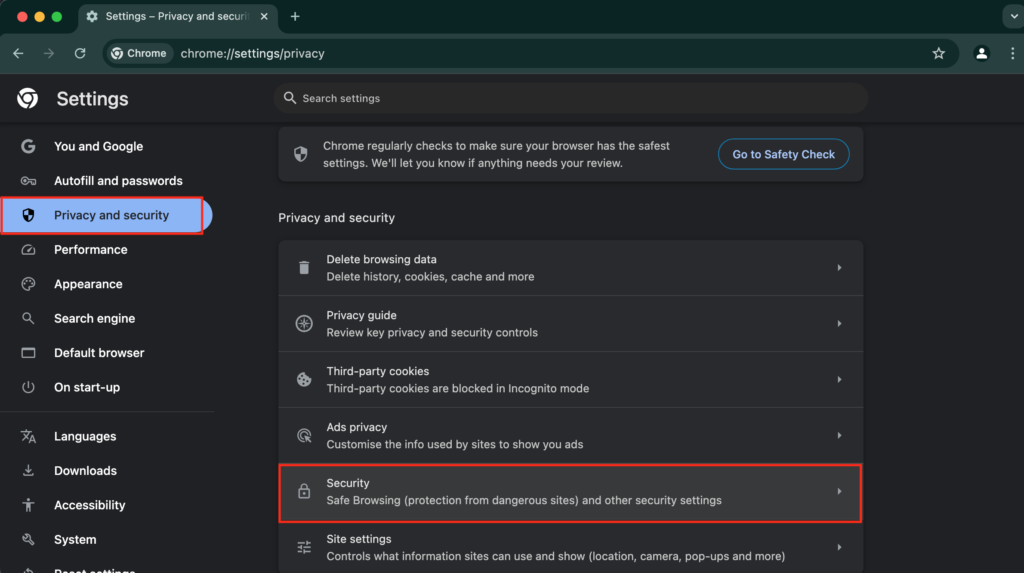
Click on the vertical three-dots icon at the top right corner, and select Settings from the bottom of the menu. Select Privacy and security from the left sidebar, and click on Security.
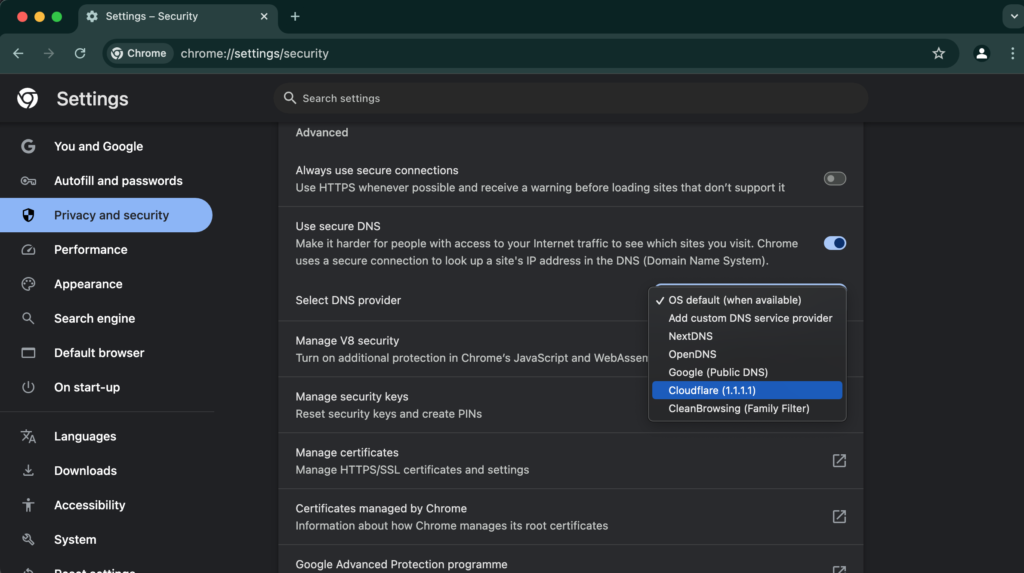
Toggle on Use secure DNS if it’s not on already and select Google / Cloudflare as your DNS provider. It uses the public DNS on a browser level, you can also change the DNS server on a device level.
Change DNS on Windows
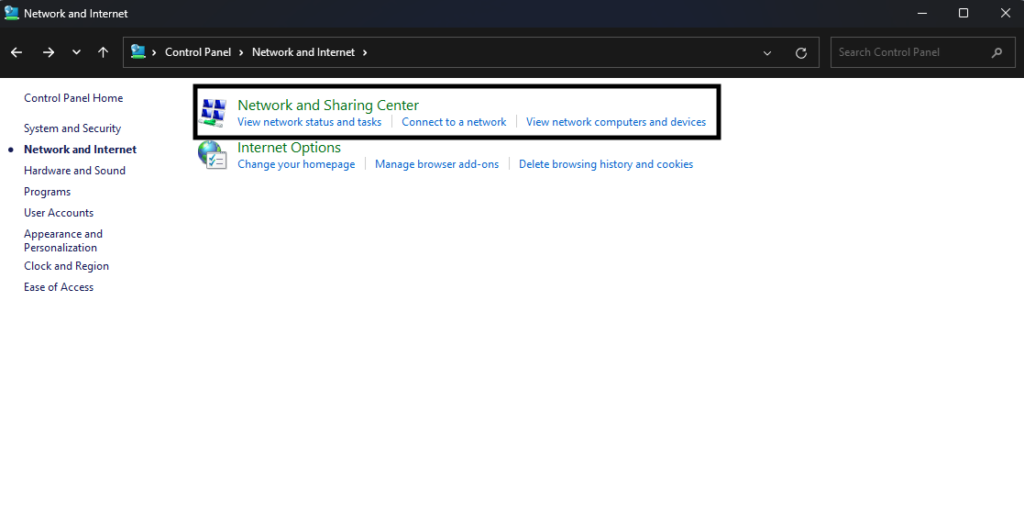
Press Windows + S, and it opens the Windows search bar. Type Control Panel in the search box and click on it from the search results. Navigate to Network and Internet > Network and Sharing center from the control panel.

Click on Internet beside Network and open Properties.
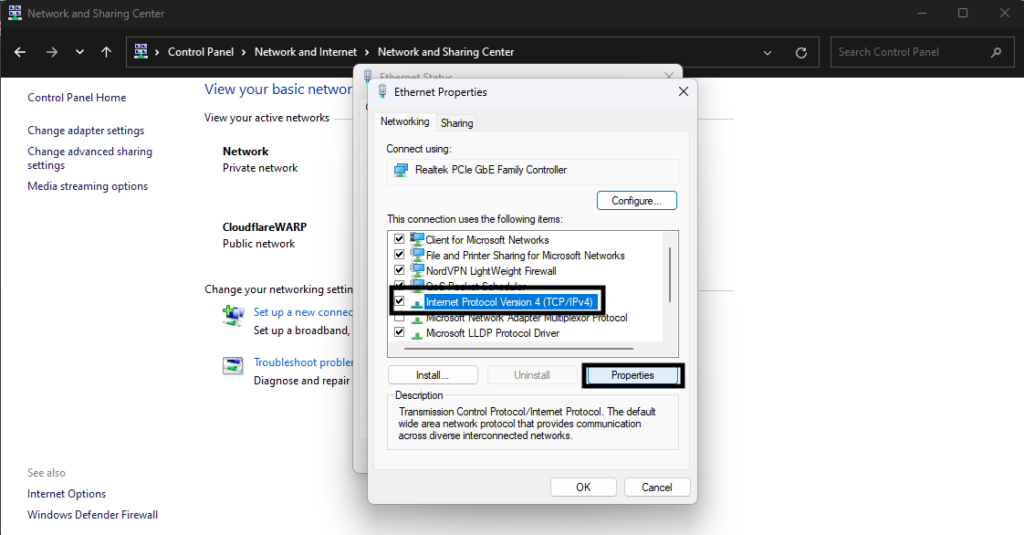
Select Internet Protocol Version 4 (TCP/IPV4) from ethernet properties and click on Properties.
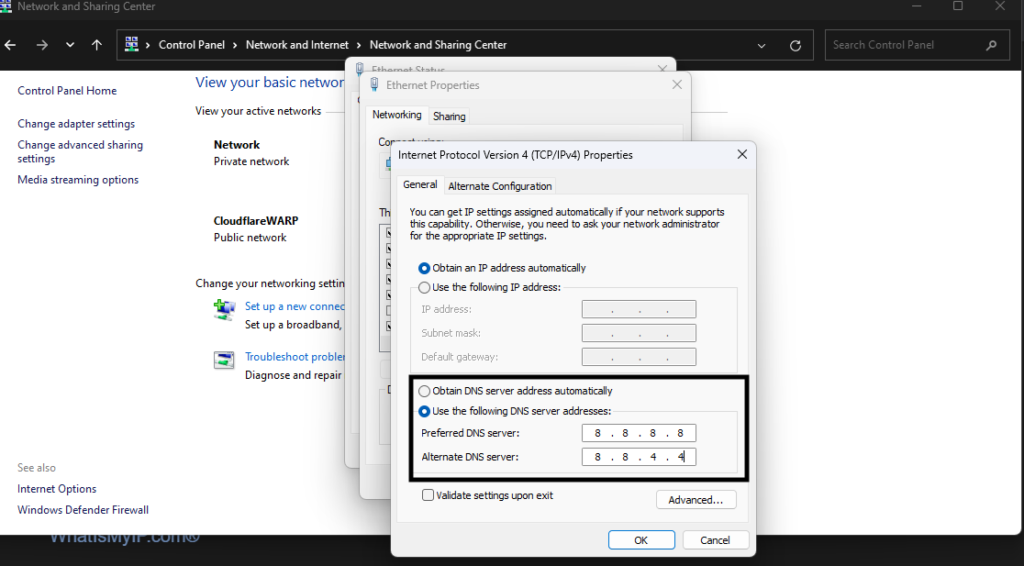
Select Use the following DNS server addresses and type 8.8.8.8 and 8.8.4.4. in the fields. First, click OK and then Apply to save changes. Restart your computer and check if the error is resolved.
Change DNS on Mac
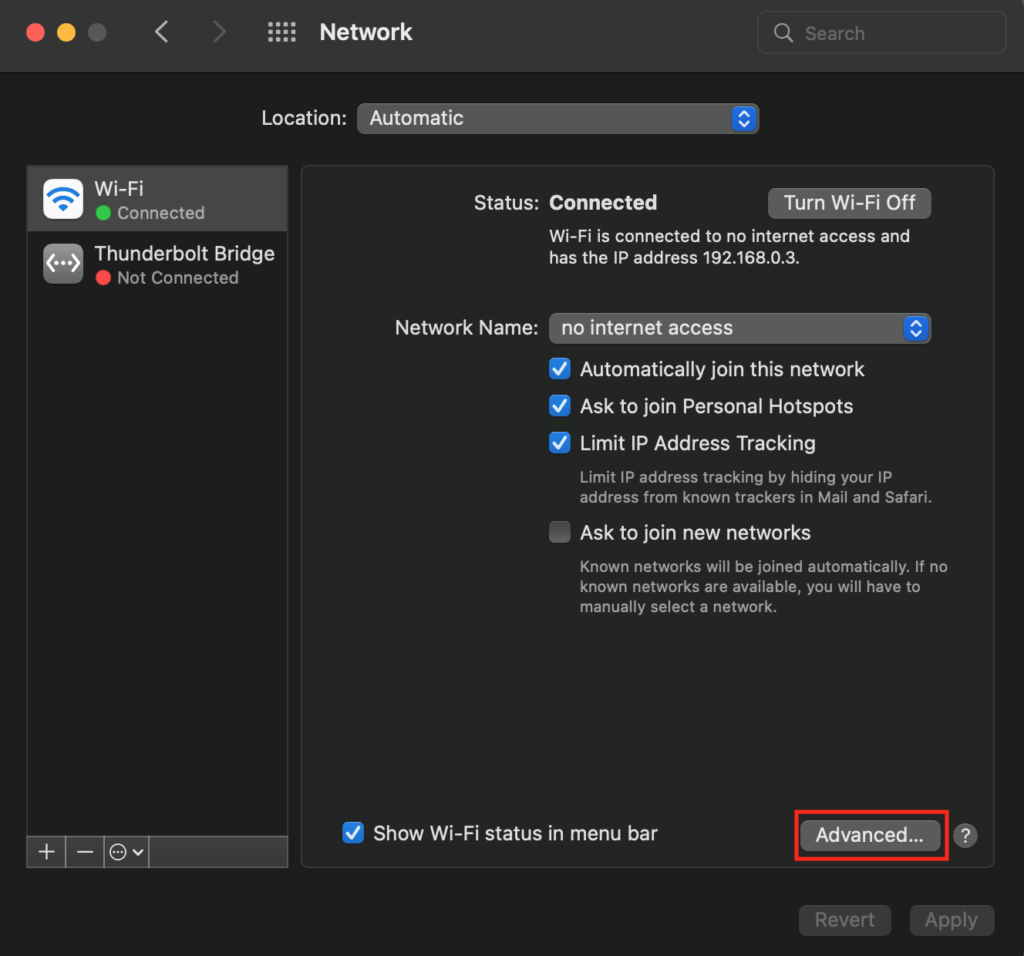
Click on the Apple icon at the top left corner and select System Preferences from the menu. Select Network from the system preferences and click Advanced.
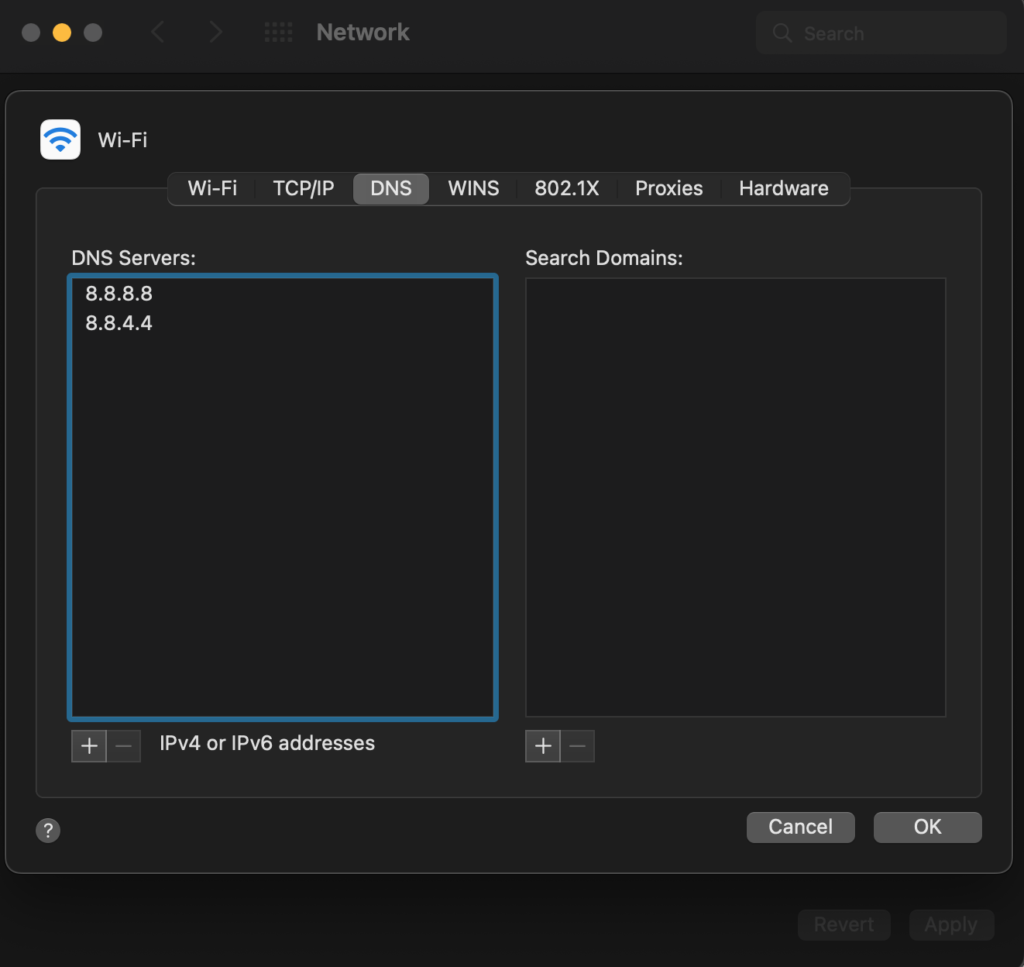
Switch to the DNS tab, and click on the + beside IPV4 or IPV6 addresses. Add 8.8.8.8 and 8.8.4.4; these are the Google’s public DNS addresses. Click OK and then click Apply to save changes.
Change DNS on Android & iPhone
Install Cloudflare WARP from the App Store or Play Store and connect to the Cloudflare services to use its DNS server. WARP is more famous than Google’s public DNS as of now.
Clear DNS Cache
When you enter a domain name in the address bar, your browser first search for a cached DNS resolution on your device. If you previously visited a website, then there should be a cache of the DNS query stored on your local machine.
Broken DNS cache can cause this error as it’s mainly DNS based issue. You can clean the DNS cache from your device, which forces your browser to request for a new DNS query to get the updated DNS information.
Windows
- Press Windows + S, and search for CMD.
- Click on Command Prompt from the search results.
- Type ipconfig /flushdns and press Enter.
- Restart your computer.
Mac
- Open Terminal on your Macbook.
- Type sudo dscacheutil -flushcache; sudo killall -HUP mDNSResponder.
- Press Enter and type your administrator password.
Disable VPN
Using a VPN app or browser extension can interfere with your network settings on the device/browser level. It also uses different DNS server addresses for various locations. You can disconnect from the VPN if the error occurs or switch to a different server.
If you use a browser extension, click Extensions, select the VPN extension, and disconnect from the virtual server. Otherwise, open the VPN application on your device and disconnect.
Check Hosts File
Computer operating systems have a hosts file that maps IP addresses for specific domain names. It’s a faster way to connect to a website as it doesn’t need the DNS resolution.
Misconfiguration in the hosts file can cause this error as every time you try to visit a website, your device checks the hosts file for a match.
You can modify the hosts file and check if the domain name showing the error is added to it.
Windows:
Press Windows + R on the address bar and a search bar appears on your screen. Type Notepad, and run it as an administrator.
Click on File and select Open. Navigate to C:\Windows\System32\drivers\etc\, select hosts, and click Open.
Note: If you can’t see any files, click on the drop-down menu beside the File name that says Text documents (*.txt) and select All files.
If the domain name that shows the error is on the list, remove it with the associated IP address. After making changes, press ctrl + s to save changes. Now open your browser and try to visit the website.
Mac/Linux
Open Terminal on your Mac, type sudo nano /etc/hosts. Enter the administrator password, check for the domain name, and remove it from the file. Save the changes, open your browser, and go to the website. There shouldn’t be any error now.
Disable Antivirus
The issue is mainly DNS-based, but Antivirus can cause this issue. There’s an easy way to figure it out if you have an active Antivirus application on your computer. All you need is a secondary device.
Open a browser on your secondary device where there’s no antivirus or VPN, and visit the same website.
If you can visit the website without Antivirus, you need to disable the Antivirus to access the website. Otherwise, it’s DNS-based and you should follow other steps.
Restart DNS Client
Windows computers have a dedicated DNS client running all the time. It allows your computer to resolve DNS queries from the cache or remotely.
You can’t stop or restart the DNS client on Windows 11, but you can refresh the DNS client.
Press the search icon on Windows, search for services and click on it from the search results. Scroll down and find DNS Client. Right-click on it and select Refresh. Restart your computer and see if the problem is solved.
Check the DNS Records
The error code specifically indicates that the browser didn’t find an IP address. Now, it could be your DNS server-related issue or the website owner’s fault.
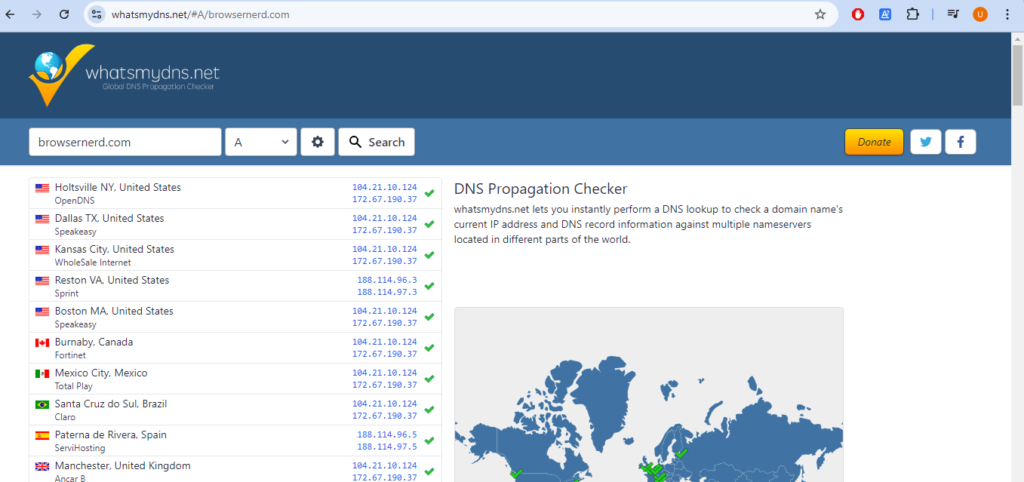
You can check the global status of the website. Go to WhatismyDNS, enter the domain name and press Enter. The A beside the domain name indicates that you are checking the server IP associated with the domain.
It shows results from various countries and cities to ensure the availability of the website across the globe. If you can see an IP address in the results, it means the issue is on your device.
Check Nameserver Settings
Nameservers are extremely important for any website because they store the DNS information, such as the website’s IP addresses.
A slight misspelling in the domain’s nameservers can cause this error as the DNS query won’t be able to retrieve the IP address from the right place.
Go to your domain’s control panel and double-check the nameserver configuration. Suppose, using Cloudflare’s nameserver means the DNS query will try to retrieve the website’s IP from your Cloudflare site settings.
You must add the website’s IP address to your Cloudflare portal, otherwise, the DNS query won’t find an IP address.
Conclusion
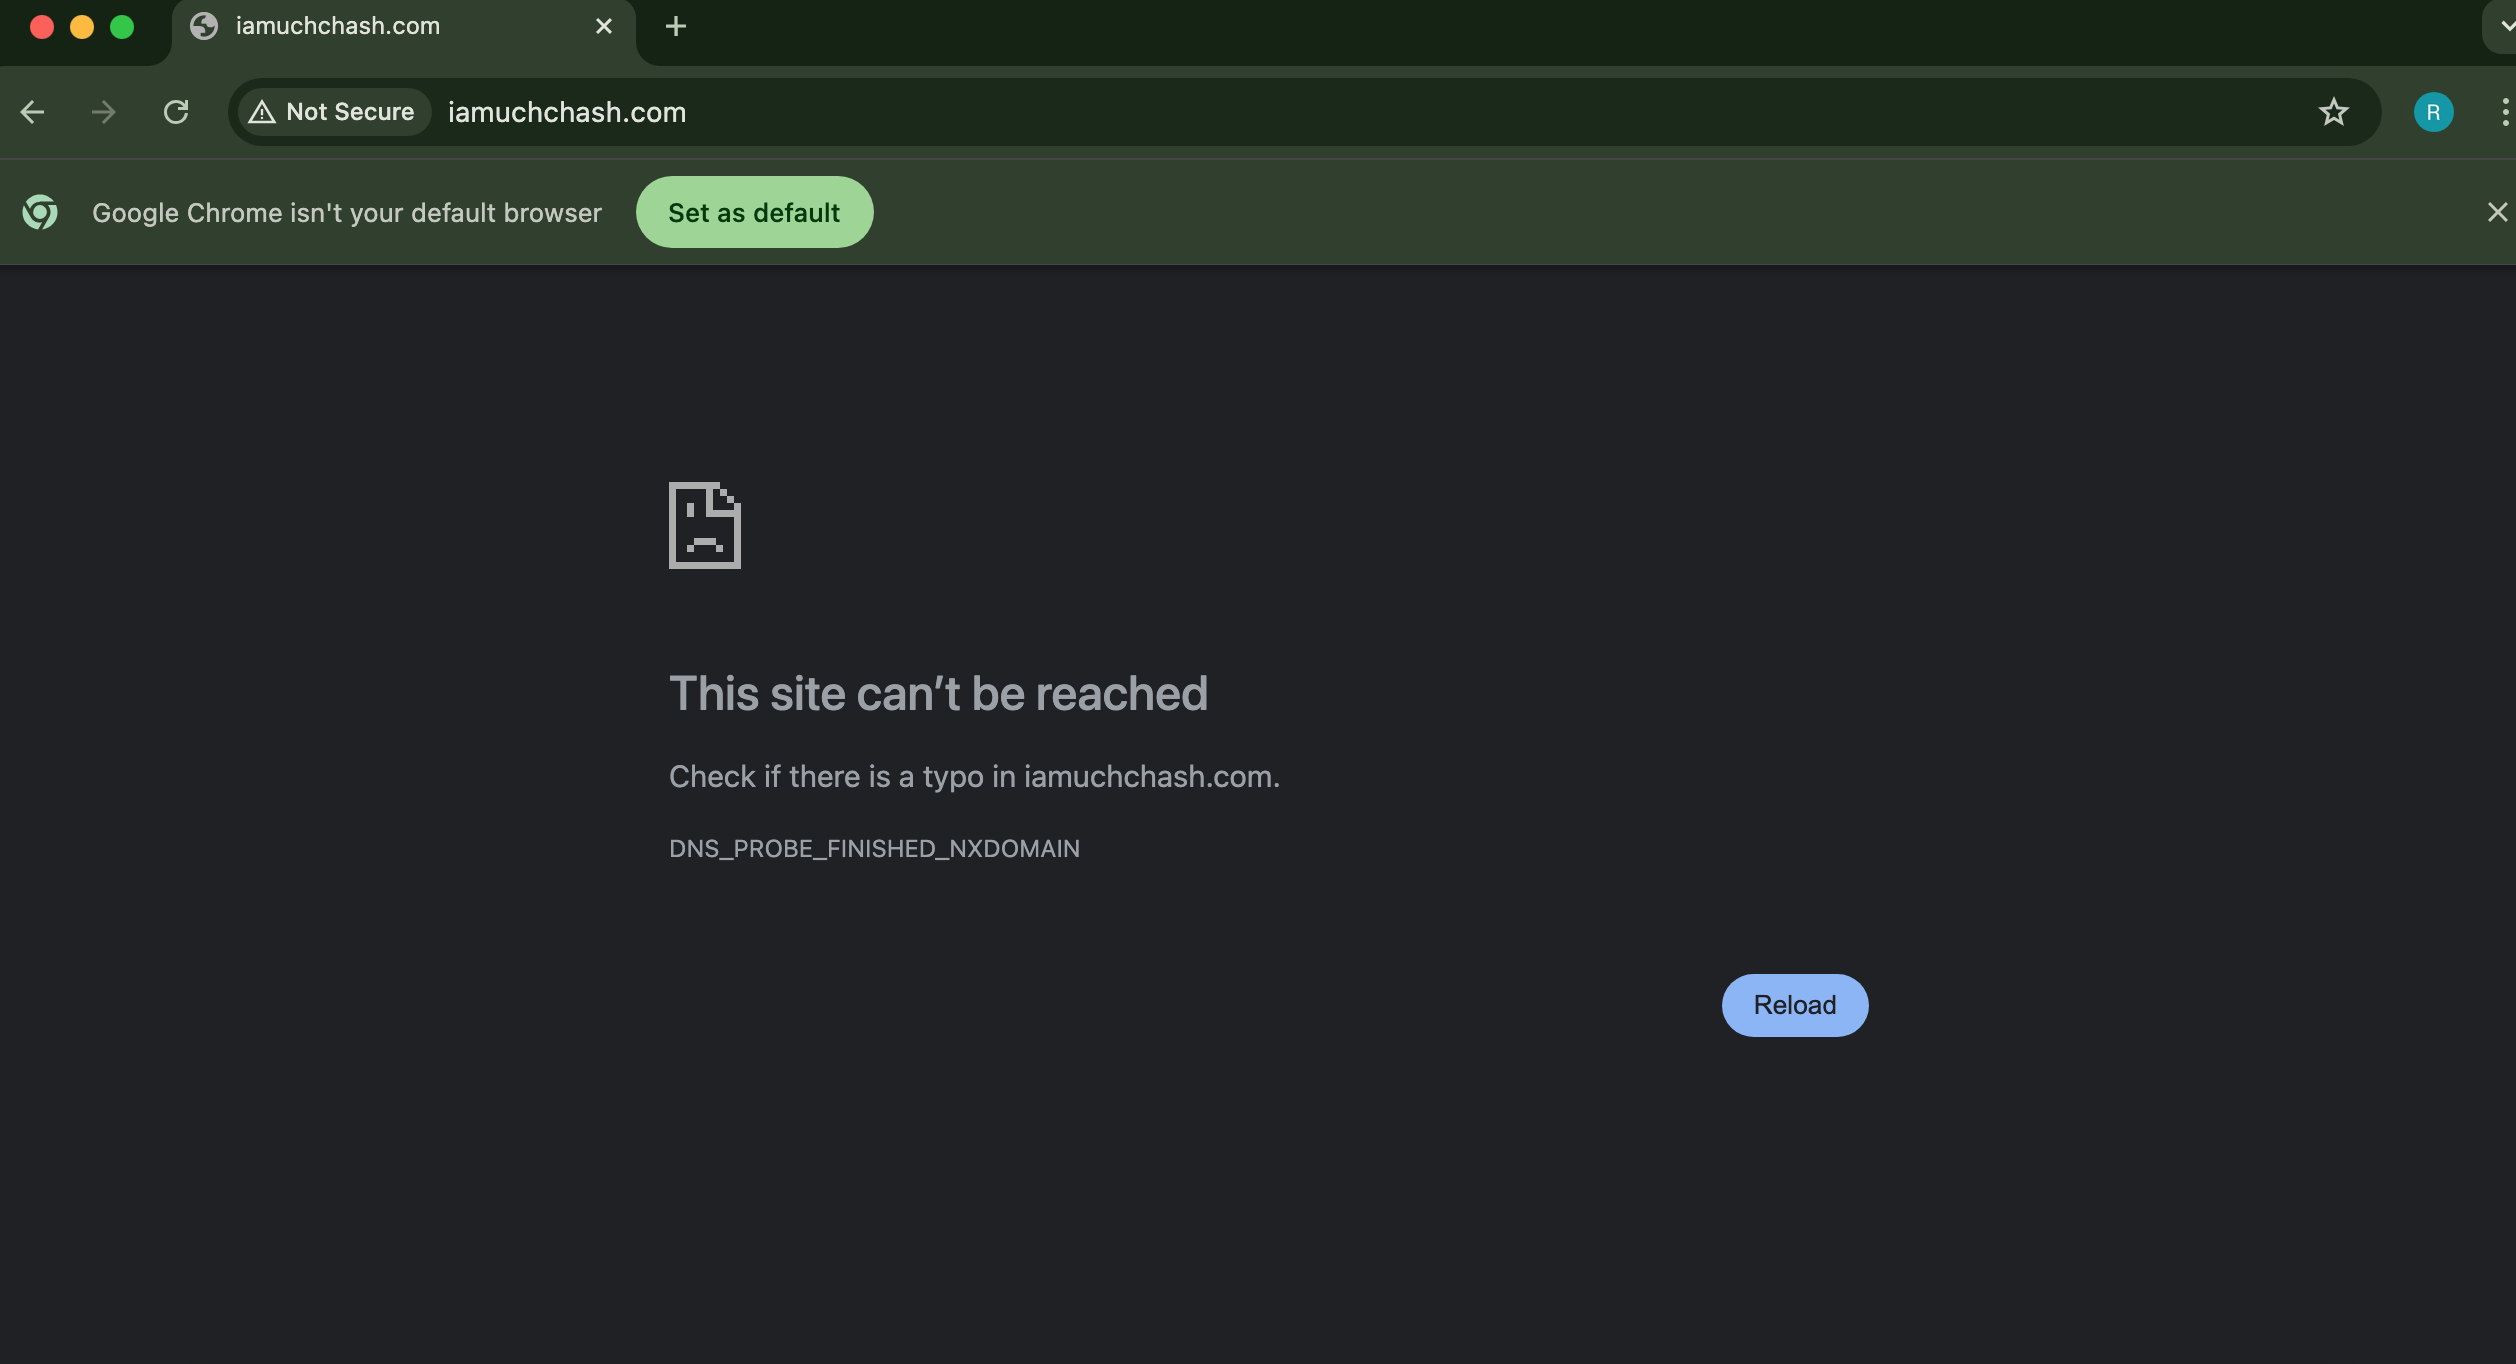
In my experience, the error code mostly occurs when the domain name is incorrect/expired or the DNS server is blocking the query for that specific domain. So, if you get the DNS_PROBE_FINISHED_NXDOMAIN error on Chrome, first check if the domain name is registered, and then update the DNS server.

Changing the DNS server really fixed my problem. Thank you so much.